Hand Crafted Save The Date Card
Get out the paper, glue and scissors! We're going to show you some ways to make your save the date cards from scratch with materials you can pick up cheap at your local craft or department store. Wedding stationary has never been easier.
Click on the card to see more details.
Irmas Handmade Save the Dates - 1st attempt
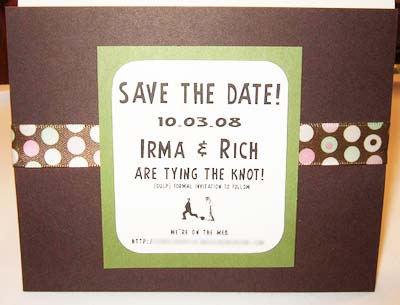
Irma & Rich are tying the knot! (Gulp) formal invitation to follow
Materials
-
Brown A6 flat cards from paper source
-
Moss #10 flat cards from paper source
-
Cream 8 X 11 card stock
-
Polka dot ribbon from Hobby Lobby
-
Lots of glue dots
Step 1
I created the wording with the ball and chain in Photoshop and printed it on to the cream card stock, cut it to size then used a edge rounder. I used the phrase Irma and Rich are tying the knot. We tried other save the date wording phrases as well.
Step 2
Wrapped the ribbon around the card and used glue dots to stick the ends of the ribbon to the front of the card at the center.
Step 3
Cut the moss flat cards to size to be larger than the cream ones and used glue dots to fasten down on top of the ribbon to hide the ribbon ends.
Step 4
Used more glue dots to fasten the cream stock to the moss stock.
Handmade By Irma Rodela
Joliet, IL USA
Irmas Handmade Sace the Dates - 2nd attempt
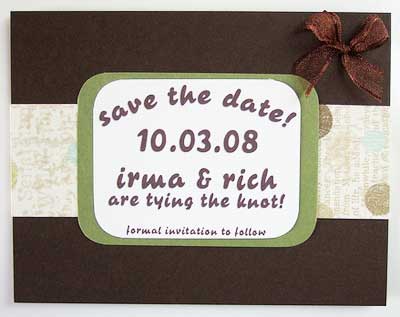
Materials
-
Brown A6 flat cards from paper source
-
Moss #10 flat cards from paper source
-
Cream 8 X 11 card stock
-
12 x 12 decorative polka dot paper from Michaels
-
ribbon for tiny bows from Michaels
-
lots of glue dots
Assemble
Step 1
I created the wording in Adobe Photoshop and printed it on to the cream card stock and cut it to size then used a edge rounder on each of the corners.
Step 2
Cut the polka dot paper into 2.5 inch strips and wrapped it around the card and used glue dots to close the flaps on the front.
Step 3
I cut the moss cards to size to be slightly larger than the cream cards and then used glue dots to adhere them to the front of the card on top of the paper strip ends.
Step 4
Adhered the cream stock to the moss stock with glue dots.
Step 5
Made tiny ribbons bows to place in the top right hand corner
Step 6
Printed wedding website info on mailing labels and stuck those to the back
Handmade By Irma Rodela
Joliet, IL USA


