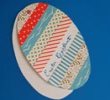
The Best Pocket Fold Wedding Invitations
We have a few different kind of invitations that utilize the pocket folds but I think this one is by far one of my favorites for Weddings. Allison Garcia has kindly written this step by step tutorial for us DIY Brides to create these beautiful wedding invitations. Allison had been searching online how to make a good pocket wedding invite. She didn't like the ones she found and so whe thought she would put her "skills" to the test and created her own. This is a Side by Side invite.
A note of caution. These invitations are definitely not for the faint hearted, be prepared to put in lots of time to create these invitation masterpieces, magnificience does not come without a cost. Now would be a great time to spend some quality time with your bridal party. Organize to get together with your your brides maids for a night of wine, cheese and invitation making. The grooms party can also be included if wish.
Time to Make: 10 to 20 minutes depend on experience.
Take a look at the homemade pocket fold wedding invitations that Allison crafted.
Key terms:
- Bottom of the page meaning the part closest to you.
- Top of page meaning the part of the paper that is the farthest form you
- Right side of paper meaning the right side when you are facing the paper
- Left side of paper meaning the left side of paper when you are facing the paper.
Materials
-
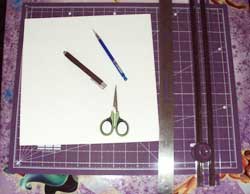 All my materials was bought at Archivers (scrap booking store
www.archiversonline.com)
 - 1- Pencil and Eraser
- 1- 12x12 stock card
- 1- Magnetic Cutting Mat ( any mat with numbers will work)
- 1- Magnetic 18 inch Ruler ( any Ruler will work)
- 1- Pair of scissors and Magnetic anywhere Twist Trimmer ( any cutting device that cuts a straight line works)
- Some type of Glue ( Glue stick, Glue Dots, I don’t recommending using regular Elmer’s glue that needs to dry. Hot glue gun works too)Take the 4½" x 12" strip of cardstock and score a fold from the top at 4½" and again at 10"
Cutting
Step 1:
Line your paper up so it is on your mat with the corner at 0 and it should read 12 x 12. ( might be just a hair shot that is ok. You want to make sure the top of your paper stays at the 12 inch line mark and your right side of your paper stays at the 12 inch line mark when making new cuts.)
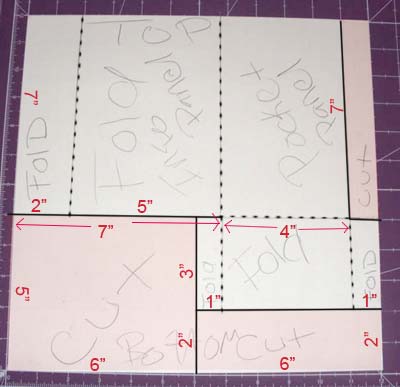
Mark, cut and fold your 12"x12" - follow this template
Step 2:
On the Left side of the paper from the bottom at the 5 inch mark
cut a 7 inch long cut.
Step 3:
From the Left side bottom cut on the 6" mark up to your previous cut (you should have 1 inch cut that will be for the flap for the pocket).
Step 4:
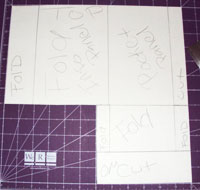
At the Bottom of the paper cut 2 inch from the bottom off.
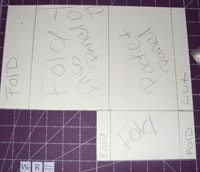
Step 5:
At the top right of your paper make a 1 inch vertical mark all the way down to the bottom of your page. 3 inches from bottom right make a horizontal that meats with your previous mark of 1 inch. This should leave you two sections. Cut the top section it should measure 7 inch (long) by 1 inch (wide).
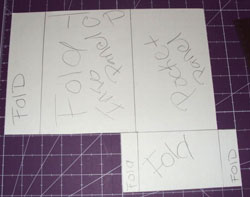
Folding
Step 6:
Fold your 3 inch flap (on the Right side of paper) you have left over from Step 5.
Step 7:
On the Left side of paper measure 1 inch and fold it over towards your other flap and fold from step 6. (this was the left over from step 2 from your 7 inch cut)
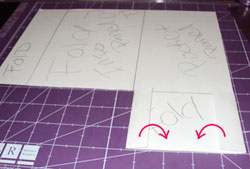
Step 8:
Take your two folded over flaps and fold the whole bottom up to the top (to be even with the rest of the paper to make your pocket)
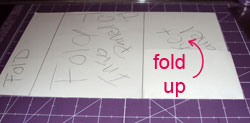
Step 9:
Fold Your paper over your pocket side (Left to Right)
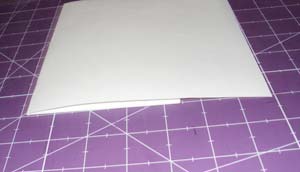
Step 10:
On the Left side of your paper measure 2 inches ( this will make the Flap to your Envelope style back). And then Fold over.
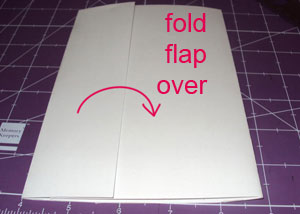
You Then can unfold it all and cut your pocket and back flap to any type of design you wish. Here is what mine looks like (unfolded)
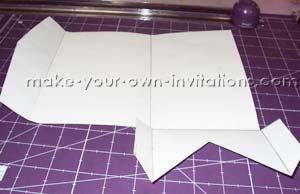
Pocket fold wedding invitation with decorative cuts
Glueing it together
Step 11:
Glue down your Pocket flaps. You could also use a Glue Dot or Glue strip to hold down the Back flap as well! Or Ribbon or what ever you feel you want to do)
How it should look
Your Middle section should be 5 inch (wide) by 7 inch (long) - Place your actual invitation here. It should measure approx 4 3/4" x 4 3/4" so that it fits nicely.
Your Pocket folder (right side) should hold any paper’s 4 ½ inches wide. Good for Rsvp, wedding maps, directions and any other information your guests may require.
Your closing flap should be about 2 inches (unless you cut it down)
Now you can either buy 7 inch ( long) by 5 inch (wide/tall) Envelopes and mail them out Or if the cardstock you used is thick and firm enough you could just write on the front of it to whom you are sending it to.
Have a look at the homemade pocket wedding invitations that Allison crafted.


