Making Wedding Invitations With Rubber Stamping Techniques
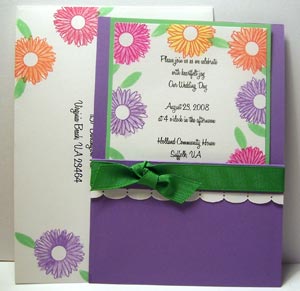
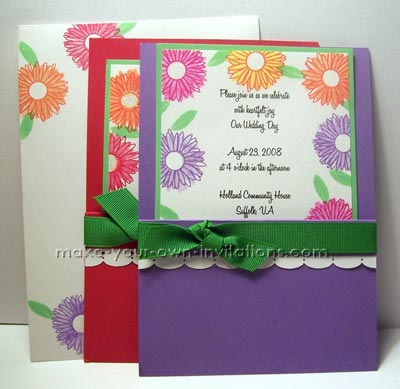
I made these wedding invitations for a friends wedding. I made 125 of them in 5 different colors with matching envelopes, RSVP's and direction cards. I am also making 100 Thank You cards to match them.
They are a pocket invitation and measure 5x7".
 Materials
-
Stamp set "Garden of life" by Paper Trey Ink
-
Stampin Up cardstock in Real Red, Pink Passion, Lovely Lilac, Yoyo Yellow, Only Orange.
-
Cryogen White cardstock from cutcardstock.com
-
Stampin Up ink pads in Real Red, Pink Passion, Lovely Lilac, Yoyo Yellow, Only Orange.
-
5/8" Ribbon
-
Tombow Mono Multi liguid glue and Scor-Tape (or a thin double sided tape)
 Directions
-
Cut a 10" x 5" strip of colored card stock to form the pocket for the invitation to sit in.
-
Score a fold 7" down the length of this strip
-
Fold up the remaining 3" and tape it down along the sides using a thin line of liquid glue.
-
Now take the white cardstock and create a pretty trim with decorative scissors. I made a scalloped pattern. Trim it to be 5" long and glue this to the top of the flap with the Scor-Tape.
-
Take the ribbon and wrap it all the way around the flap and tie it in a knot in the front and to one side.
-
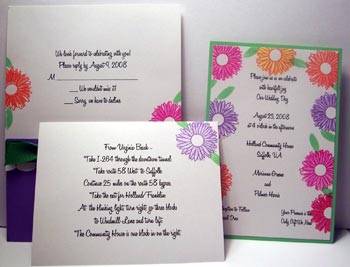
The lettering was all typed in MS Word and printed onto the white 4x6 cardstock inserts. I then stamped the gerberas with the 5 different colors around the card to create a border. I stamped the leaves in green ink.
-
This card was then mounted on to 4¼" x 6¼" green cardstock
-
The RSVP cards and directions inserts were also printed on white card and embellished with a couple of stamped flowers.
-
It was simple enough to create matching envelopes by stamping a few flower imprints on the front.

Finished printed and stamped invitations
Everyone loved them and even wrote a note about how beautiful they are on the RSVP's!
Made by Jimmi
You might also like
More cool DIY Wedding invites
How to make a Pocket Invitation


