Knight and Princess Birthday Invitations
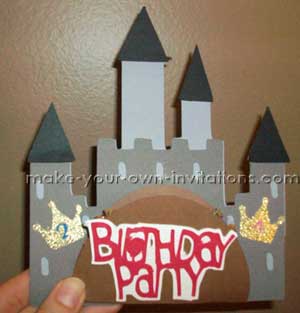
These homemade castle invitations were made for a joint birthday party for my 2 year old boy and 4 year old girl. We themed it a Knight and Princess party. Naturally a castle ties both the girl and boy themes together quite nicely.
They were made using a Cricut machine which cuts out the shapes you need onto card. But you can use the shapes in the images below as a guide to draw and hand cut your own castle from card stock.
How to make a Castle invitation
-
I used 'Once upon a princess" cartridge from cricut and did as follows. The jargon applies to the cricut machine so it maybe confusing if you do not own one.
-
 6 1/2 inch light grey castle and then did shift, castle for the darker grey
portion 6 1/2 inch shift, layer, castle in black for the turrets...this makes
a small draw bridge but I needed a bigger one because I am going to place the
details inside it and have it open up. So the small black drawbridge is extra.
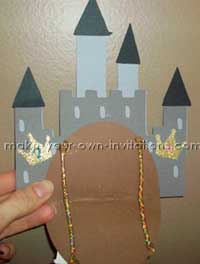
For the drawbridge I used 4 1/2 inch Shift, gem, frog. I did this in brown.
Then you fold the egg in half and boom, draw bridge that opens up!!
 -
I then did the crowns in corresponding age numbers. ie. age 4 was 1 inch shift,font, princess dress 1, . I used gold glitter paper for the crowns. Only fitting...and then added a pink or blue behind each crown. The birthday party wording is 2 inch shift,phrase, Gift bag3. I tried to shadow in white but didnt really like the way it turned out. If anyone has figured out a good way to shadow that, let me know. For some reason it wouldn't cut very good for me. This took approximately an hour to figure out the measurements and stuff. But, since I have figured this all out for you it will take only minutes to cut and assemble
-
I will add some flags to the top of the turrets.

handmade princess birthday invites
made by Monica Korba
Columbia, MO


